


5 simple (but important) things to remember when re-vamping your child's bedroom
- Mar 2, 2019
- 5 min read
Decorating your child's bedroom is a tricky thing especially as they get a little older and they are starting to voice their opinions!!!
Are you the person that lets them join in and be a part of the process or do you keep them well away from any decision making for fear of a fushia pink fairytale explosion or a Peppa Pig themed room!
Well I have to say that at first I was a little bit like the first and kept them away from as much as possible - however in my old age or maybe its after the third child that I have relaxed a little. Now don't fear - there will be no Peppa Pig themed rooms or fairy tail explosions in my home any time soon but I am certainly taking a little more direction from the kids.
Take my recent project (my Little boys bedroom) He's 2 and LOVES cars and trains (basically anything with wheels and makes a noise)
It was time for him to get out of his cot and into a 'big boy bed'
At the same time a friend was moving house and getting rid of her son's bed - a bright red sports car bed....... years ago that would of filled me with dread but the grown up me thought no! lets give my little boy the bed of his dreams. Make this move from cot to bed as exciting as possible and maybe just maybe it would be a lovely painfree transition...... and do you know what. It has been.
So here are my 5 top tips for you to consider when redecorating/revamping your kids bedrooms.
1. Always top of my list is PLAN. Take a moment to write some lists. First find out what your child likes but dont promise anything - just get ideas on paper. Colours they like/tv they like/hobbies etc..... My son likes cars so that was immediately my starting point (well I guess the sports car bed was!) He also loves blue. I very much wanted to have a room that grew with him so it had to not be too child like. I needed to be able to have the room for the next 5 years and then be able to update parts of it without having to redo everything. A room that evolves as he grows rather than has to completely change every few years.

2. BUDGET. Set yourself a budget. Even if it changes thats OK but we all know roughly what we want to spend. My budget for my son's bedroom was £500. Now this was pretty low because I didn't need to paint the room or add curtains/blinds.
The best thing to do is write a list of what you need for the room and put a budget figure in -

3. CREATE A MOODBOARD - Sounds simple but this is really important to keep you focused on what you are doing in the room. This can all be created on line - go shopping and have a play with what you like within your budget and get it all down on a mood board. You now have a clear idea on the style you are having for that room so even if you go out browsing the shops you can refer back to this when your out and about. I had a different rug on my board from a shop online but eventually found my rug in home sense. It was perfect to be able to refer to my original board to check that it was going to fit my style and brief and I wasn't just getting side tracked by lovely new things!

4. Can you upcycle or reuse items. This is a good one especially in our throw away world..... take a look around your home (or familys homes!) and see if there is something you can re-use. Remember furniture can be given new life by repainting and picture frames re used. Maybe you have a great desk light that can be used as a bedside? One of the other reasons I went with the car bed for my son was that it seemed such a waste to not use it for a few years rather than see it thrown away.
5. Think practically. When designing a room remember who you are designing for...... If its a kids room then remember they are using this room primarily so make sure they can. Another of the reasons the car bed was so great for my son (as I'm writing this I am realising how amazing this bed is!) was that its really low to the ground. This is perfect as it was his first Bed and so it meant that if he was to fall out - he wouldn't fall far! although another fab' thing is that the bed kind of has shaping which forms sides to the bed. The end of it also has a little step up which is his way of getting in.
The little locker bedside I got him is easy for him to open and is HIS space to put his things in (and that makes him very happy) The wardrobe and drawers and both kids style and size which means he can use them easily too. These I bought with a real budget in mind as I knew that these would last a few years and would eventually go and be replaced by adult size pieces that would be around for years and years....
One big thing I had to think about was the pictures above the bed....... for the design they really needed to be there but obviously I didn't want then to be heavy and have glass in them so I bought budget friendly and save frames from the Range which are filled with a perspex sheet. These are fitted really well to the wall so shouldn't fall off but if they were pulled down they would be pretty safe.
and finally
I also have blackout lined curtains in his room as I feel for little ones this has always helped them sleep.


SO where was I in terms of budget for this room - well actually pretty spot on in the end. Things shifted around a little. I spent a lot more on the rug as I knew its something I would use for a long time if not forever and I saved on some things too.
List and links to suppliers at the bottom of the page x

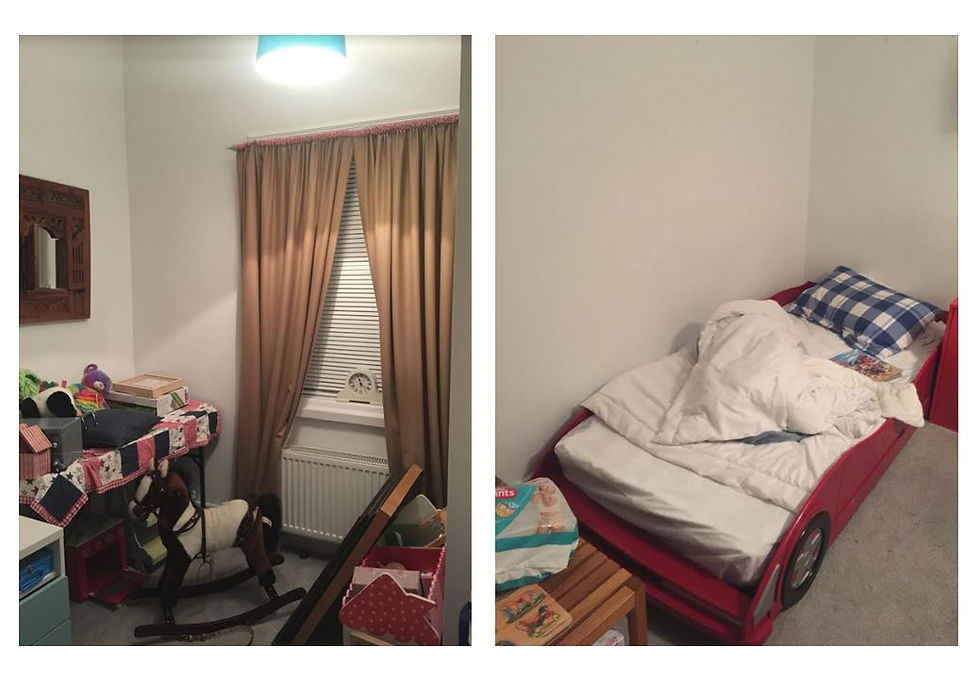
Oh and if you're wondering how it looked before then take a look below x
I hope that this gives you tips to revamp one of your kids rooms or even your own (tips all apply!) or if you would like a little helping hand from me then give me a call or message me @ Floella

List of stockists from kids bedroom REVAMP
Vintage car prints - https://www.printarcade.co.uk/products/sweden-grand-prix-poster-vintage-car-racing-print
Large frames
Metal locker
Blue wardrobe and drawer set
Rug
Wicker baskets
Bedside lamp
Comments